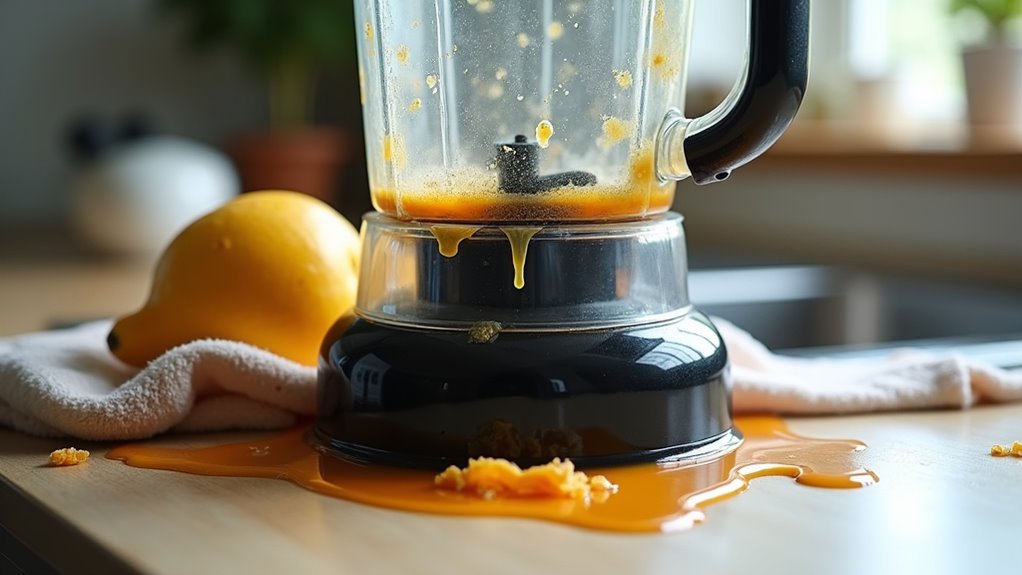
A blender leaks because seals, blades, or container damage fail to stop liquids. Worn gaskets at the jar base commonly cause drips. A loose or damaged blade assembly lets liquid escape from the bottom. Cracks in the jar or lid create obvious leak points. Tightening parts and replacing worn seals usually fixes most leaks quickly.
Common Blender Leak Causes
Provided that your blender is leaking, don’t panic, because the cause is often simple and fixable. You might see worn gaskets or O-rings at the blade assembly, and they stop sealing when they crack, harden, or loosen.
Next, a loose or cross-threaded retaining nut can let liquid escape from the jar bottom, so check the washer and thread alignment.
Also, tiny jar cracks or chips can drip even whenever seals look fine, so inspect under bright light.
Food residue on the lid seal groove or base can block a tight fit, so clean both surfaces well.
In case you overfill, foam, or use high speed on thick mixes, pressure rises and forces leaks.
Should the motor overheating have you worried, check warranty coverage too.
Find Where the Blender Leaks
To track down a blender leak fast, start with a simple water trial and let the initial wet spot tell the story. Place the unplugged jar over a paper towel, fill it below the max line, and wait 2 to 3 minutes. Then check where the opening drip lands. In case it starts at the lid edge, focus on lid alignment, dirty seal grooves, overfilling, or foam pushing liquid out.
Should you see a steady drip along the jar wall, inspect under bright light for a hairline crack. In the event the leak shows at the bottom or blade area, look for a loose nut, worn gasket, or damaged shaft seal. For pressure assessment, repeat the check with the jar still and during blending, with the lid on.
Run the 60-Second Leak Test
Now let’s narrow it down with a quick 60-second leak check, because a small drip can be sneaky and annoying.
Unplug your blender, then fill the jar with plain water to just below the max line, or about three quarters full. Set it on a dry paper towel and leave it alone for 2 to 3 minutes. This kind of pressure testing helps you spot the initial wet mark fast, so your quick diagnostics stay simple.
In case the spot shows at the lid edge, clean and reseat the lid seal groove and don’t overfill.
Should it appear on the jar wall, shine a bright light and look for hairline cracks.
When it shows under the bottom or near the blade area, check for looseness, cracks, or flattening, then examine again.
Worn Gasket or O-Ring Leaks
A worn gasket or O-ring is often the quiet culprit behind a blender leak, and it can turn a small kitchen task into a messy surprise. You’ll usually spot rubber degradation after heavy use or many dishwasher cycles. The seal could look cracked, brittle, or flattened, and temperature effects can cause it lose its springy fit. Should it no longer bounces back whenever you pinch it, the jar bottom can start dripping.
Even a gasket that looks fine can leak provided it sits unevenly in its groove, so check the seal carefully. Replacing it’s usually simple and cheap, often $5 to $20. Also, keep the sealing surfaces clean, dry the parts well, and avoid over-tightening so your blender stays in the group.
Loose Blade Base Causes Leaks
In case the gasket still seems fine but your blender keeps dripping from the bottom, the blade base could be the real problem. Whenever the retaining nut sits loose, liquid slips through the threaded joint under the jar. You can usually fix it by tightening the nut until it feels hand-tight plus about 55 degrees. Should the blade spin while you work, immobilize blade initially so you don’t chase the parts around. | Check | What it means |
| — | — |
|---|---|
| Nut wobbles | The seal can’t press evenly |
| Gasket shifts | Drips start at the blade area |
| Threads feel off | Reassembly might be cross-threaded |
| Leak stays | The blade assembly could need replacement |
That small twist can help you feel back in control, and your blender can belong in the kitchen again.
Dirty Seals Behind Blender Leaks
Whenever residue builds up around the lid groove or the jar-to-base seat, your blender can start leaking even though the gasket looks fine.
You’re not doing anything wrong; dirty seals just sneak up on you.
Food oils, dried drinks, and hard water minerals can leave a thin film that blocks a full seal.
That film can also make the rubber O-ring or metal flange press unevenly, opening tiny channels for liquid to slip through.
Overfilling and Foaming Problems
Even after you’ve cleaned the seals, your blender can still leak provided you pack the jar too full or make the mix too foamy. Whenever you fill past the max line, the blade work builds pressure and the liquid climbs toward the lid. That’s why overfilling prevention matters for every home cook who wants fewer messes and more confidence.
- Keep thick blends at 1/2 to 2/3 full.
- Start low, then ramp up speed.
- Add liquid a little at a time.
- Use a tamper for foaming reduction.
Foamy smoothies, nut butters, and carbonated mixes trap air, then rise fast. In case you begin on high speed, you stir in even more air and push liquid out around the lid edge. A calmer start helps your blender stay sealed and your kitchen stay friendly.
Cross-Threaded Blender Parts
A blender can start leaking from the seams not just because of a worn seal, but also because the parts aren’t threaded together the right way. Whenever you check thread alignment, you help the lid, retaining ring, or blade assembly seat fully and hold your group together. | Issue | Sign |
| — | — |
|---|---|
| Misaligned threads | Uneven gap |
| Too much force | Hard turning |
| Dirty threads | Leaks at base |
In case the nut feels stuck, stop and back it off. Clean away food bits, then line up the threads by hand before you apply light assembly torque. You should feel smooth engagement, not a fight. A small quarter-turn past hand-tight is usually enough. Should you keep forcing it, you can strip the threads and make the leak worse. Whenever the metal or plastic looks chewed, cracked, or bent, replace that part so your blender can seal well again.
Cracked Jar or Base Damage
Check the jar for hairline cracks, especially near the bottom and seams, because tiny splits can leak only as pressure builds during blending.
Look closely at the base seal too, since impact damage can loosen the blade area and open a sneaky leak path.
Should you spot a crack in the jar or base, replace the part right away, because patching near the blades isn’t safe and usually won’t last.
Hairline Crack Checks
Hairline cracks can hide in plain sight, so your best move is to look closely and patiently. For hairline detection, use a careful visual inspection initially. Hold the jar under bright light, then turn it slowly so you can catch tiny lines near the bottom rim, the wall, or the base join.
- Feel the edge and underside for rough spots.
- Shine sunlight or a strong lamp through the jar.
- Fill it below the max line for a quick water test.
- Set it on a dry paper towel and watch for the initial wet spot.
If the blade area stays dry but liquid appears from the jar wall, you’ve likely found the crack. Whenever hot liquids meet a cold jar, stress can make it worse fast, so replace the jar right away.
Base Seal Damage
At the time the jar looks fine but the leak keeps showing up at the base, the problem could be deeper than the blade area. You might’ve a cracked bottom, a warped flange, or a worn seal that lets liquid sneak past the gasket. Even a tight nut can’t fix uneven pressure from damage or pitting on the baseplate.
Should you pour hot liquid into a cold jar, thermal expansion can open tiny breaks that grow with time. Check whether the jar and base match in material compatibility, because some materials stress each other more than others.
Also, were you to notice rust, drag, or a burnt smell, the shaft seal could be failing and guiding fluid into the motor housing.
Replace Cracked Parts
Whenever a blender keeps leaking even though the seal looks fine, a cracked jar or damaged base is often the real cause. You’re not alone provided this feels frustrating, but replacing the broken part can bring your blender back to life. Look closely for hairline cracks near the bottom lip, blade area, or base flange, because they can leak under normal use.
- Check for cloudy, crazed, or brittle plastic
- Inspect for drops, thermal shock, or impact marks
- Stop using it provided cracks reach the blade chamber
- Compare costs before sourcing replacements or filing warranty claims
Assuming the threaded base or retaining area is damaged, even a good gasket won’t help. Replace the part fast, since liquid can reach bearings or the motor and create bigger problems.
Fix the Blade Base Leak
A leak at the blade base usually points to a worn rubber gasket or O-ring, so start there before you worry about the rest of the blender.
In rubber gasketation troubleshooting, check for cracks, hard spots, and looseness. Should the ring not spring back, replace it.
Next, look at retaining nut torque. Hand-tighten the black nut counterclockwise until snug, then give it about 55 degrees more while you keep the washer seated right.
After that, clean the blade baseplate and jar bottom well. Scrub off food, rust, and rough spots, then reassemble the parts wet so they slide and seal better.
Were the blades still to wobble, the inner shaft seal could be worn, and you’ll need a new blade assembly.
Stop Using a Leaking Blender
Unplug your blender before you inspect it, because a leak can put liquid near the motor and raise the risk of shock or sparks.
Should you smell burning or hear grinding, stop using it right away and don’t try another spin. Then check the gasket, blade assembly, or jar, and replace the damaged part or the whole blender should the crack won’t let up.
Unplug Before Inspecting
Should your blender starts leaking, stop using it right away and take it off the power source before you do anything else. This safety reminder gives you power isolation and keeps your hands protected while you check the problem. You’re not alone here; a careful pause can save your blender.
- Unplug it before you inspect any leak.
- Set the jar on a dry towel and lift it from the base.
- Look for pooled water, damp wiring, or a burnt, musty smell.
- Let every part dry fully before you touch seals or reassemble.
If liquid is near the motor or base, don’t open it up yourself. Call the maker or a qualified technician instead. That simple step helps you avoid turning a small drip into a bigger repair bill.
Avoid Shock Risks
Even in case the leak looks small, stop using the blender right away, because water can slip into the motor base and turn a simple drip into a shock hazard. You’re protecting yourself and everyone at home whenever you treat this as a safety protocol, not a minor annoyance.
Unplug the unit, then leave it off until you’ve checked for pooling under the base or moisture near the cord. Even small leaks can corrode parts inside and raise electrical hazards during the next blend.
Repair Or Replace
Once a blender starts leaking, the safest move is to decide whether it can still be repaired or whether it needs to be replaced. You belong on the careful side here, because a quick cost analysis saves trouble later.
- Stop using it in case liquid reaches the motor base.
- Check the jar for hairline cracks or stress fractures.
- Clean, reseat, and replace a loose gasket at the lid or rim.
- Replace the blade assembly when you notice wobble, rust, or a stubborn base leak.
Should tightening and cleaning don’t help, don’t force it. Ask about warranty options, then contact the manufacturer or a qualified service center. Worn seals and bearings usually don’t reseal well, and a damaged jar can fail fast. Choosing repair or replacement now protects you, your kitchen, and your peace of mind.
Prevent Blender Leaks in the Future
To keep your blender from leaking again, it helps to treat the seals and fit like part of your regular kitchen routine, not an afterthought. With preventive maintenance, you stay ahead of small problems before they turn into messy surprises.
After each use, clean the lid seal groove, jar rim, and blade seat so dried residue can’t break the watertight fit. Once a month, check the gaskets and O-rings for cracks, flattening, or stiffness, then replace worn parts fast.
Also, keep blends below the max line and start thick mixes on pulse or low speed so pressure doesn’t push liquid past the seals. Whenever you reassemble, set the gasket correctly and tighten the base snugly.
Proper storage matters too, so dry metal parts fully and keep them rust-free.
Frequently Asked Questions
Why Did All the Liquid Just Come Out of My Blender?
Your blender likely leaked because of improper sealing, or a crack, overfill, or loose base. Motor failure can worsen splashing too. Check the gasket, lid, and jar, then clean, reseat, and evaluate carefully.
Why Is My Blender Leaking Thick Solid Under but Not Leaking Water?
Your blender is leaking thick paste because gasket degradation and motor vibration allow dense solids to squeeze through tiny seal gaps while water stays put. You are not alone. Clean, inspect, and replace worn parts to restore a snug fit.