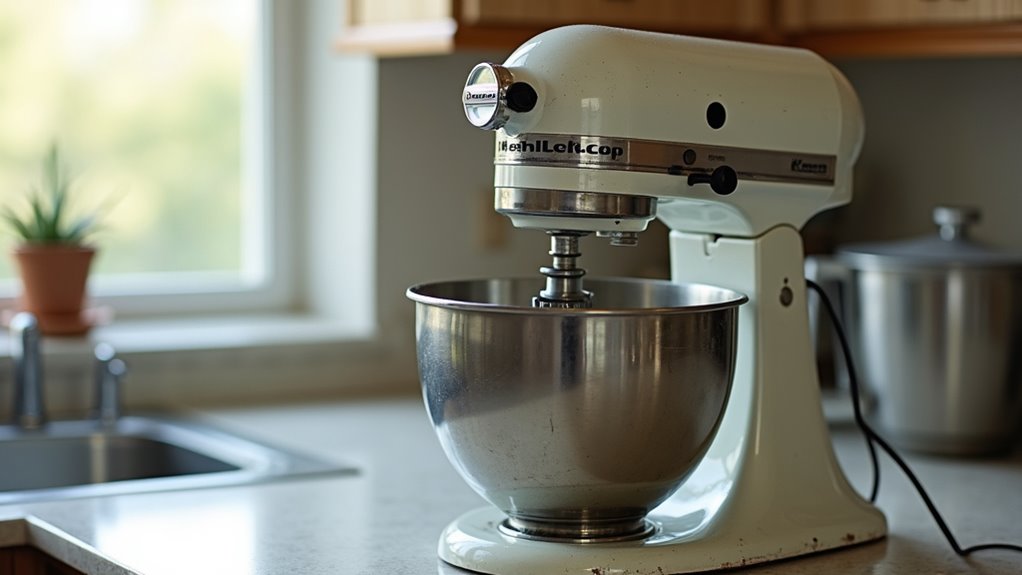
A stand mixer often signals trouble before a full breakdown with clear, simple signs. Tapping the bowl, scraping the sides, or leaving batter behind points to misalignment or worn parts. Grinding noises or wobbling indicate gear wear, loose fittings, or motor strain. Flaking or chipped beaters suggest corrosion or damaged attachments that need attention. Spotting these issues early helps decide between a quick adjustment and professional service.
What Are the First Signs Your Stand Mixer Needs Maintenance?
The initial clues usually show up while you’re mixing, and they’re often easy to catch provided you know what to watch for.
During a routine inspection, check whether the flat beater taps the bowl, since that means it sits too low. Should ingredients stay on the bottom or cling to the rim, the beater might be too high.
You should also watch the tilt-head and silver neck pin; in case they won’t lock firmly or stick, you likely need an adjustment.
While the motor humming, look for wobble in the head or chipping on the white-coated beater, because both can point to loose parts or bad clearance.
Catching these small signs sooner helps you stay in control and keep your mixer feeling like part of your kitchen crew.
Why Is Your Stand Mixer Making Grinding Or Squeaking Noises?
In case your stand mixer starts grinding or squeaking, you’re often hearing worn gears, dry grease, or a part that’s out of alignment.
You might also notice the noise change whenever the mixer takes on more load or whenever the head shifts, which can point to a loose hinge, a bad seal, or a small pin that’s wearing out.
That’s why it helps to check the grease, inspect the gears, and make sure the bowl and attachments line up before the problem gets worse.
Gear Wear Causes Noise
A sudden grind or squeak from your stand mixer can sound scary, but it often points to a fixable gear problem rather than a full breakdown. Start with a gearbox inspection and listen for a sheared retaining pin or a worn worm gear. Should the noise began all at once, a $6 pin can save you from replacing the whole gear set.
In case you hear a metallic squeal that gets louder with load, the gears might need fresh grease, and old or dirty grease can make every batch sound rough. You could also notice leakage near the gear cover, which lets grit in and speeds up wear.
In the event the sound stays, check attachments and bowl clearance too, because they can mimic gear noise and leave you worried.
Grease And Alignment Checks
Usually, grinding or squeaking starts as your stand mixer loses the grease that keeps its gears sliding smoothly. You’re not alone, and this fix is common. Follow your lubrication schedule, then open the gearbox and look for dry, blackened teeth or grease leaking from the motor shaft. Should you spot a cheap sheared retaining pin, replace it before blaming bigger parts. Check shaft alignment too, because a loose ring gear or shifted pin can make the mixer clunk or grind.
| Check | What it means |
|---|---|
| Dry gear teeth | Fresh grease is needed |
| Sheared pin | Replace the pin initially |
| Slipping ring gear | Inspect alignment and rings |
Clean contaminated grease with food-safe degreaser, repack with food-grade grease, and examine the mixer under load until it runs quiet.
When Should You Check For Bowl Or Head Wobble?
You should check for bowl or head wobble whenever your mixer starts making clunks, grinding sounds, or shows a little extra shake during use.
Also, inspect it after long idle periods or heavy use, since loose hinges and worn parts can sneak up on you.
Should the head rock or the bowl shift, tighten the hinge and check that everything sits snugly before you keep mixing.
Check For Movement
Check for bowl or head wobble before every use, and don’t skip this step after a heavy mixing session, either. You protect bowl stability and hinge integrity whenever you make this a habit.
In case your flat beater keeps scraping the bowl, stop and look for looseness right away. Older mixers, especially ones that have traveled, deserve extra care because movement can show up fast.
During a low-speed run, watch the silver neck pin on tilt-head models and notice any shift. After greasing or gearbox work, trial the mixer again and re-seat the bowl if needed.
- Listen for grinding or buzzing.
- Feel for extra vibration in your counter buddy.
- Recheck after replacing gaskets, retaining pins, or the worm gear.
Tighten Loose Hinges
A loose hinge can turn a smooth mixing job into a shaky one fast, so it helps to pay attention before the problem grows. Check for bowl or head wobble whenever you hear clunks, grinding, or after years of service, especially on mixers older than 10 years. Should the head won’t lock or shifts while mixing, inspect the hinge, neckpin, or bowl-lift pivot.
| Sign | What You Feel | What to Do |
|---|---|---|
| Light wobble | Small hand play | Tighten a little |
| Loose lock | Head slips | Check retaining clip |
| Grinding sound | Rough motion | Look for hinge corrosion |
With the mixer off, wiggle the head or bowl by hand. Should it moves, tighten the pivot screw or hinge pin in tiny turns, less than a quarter turn. Recheck soon, because worn parts might need service.
How Do You Know The Beater Needs Adjustment?
Often, the easiest way to spot a beater problem is to listen to what the mixer is telling you. Provided you hear scraping, see the flat beater chip the bowl, or notice white coating flakes, stop right away. That usually means your height calibration is off and the beater sits too low.
On the other hand, if flour or batter stays stuck to the bottom or sides, the beater might be too high. A quick clearance examination check can help you feel more confident.
- The dime should move a little on speed 2.
- In case it gets pushed hard, adjust the beater.
- Should a tilt-head won’t lock or the neck pin shifts, check the setting.
What Does Proper Beater Clearance Look Like?
Proper beater clearance looks like a tiny gap at the bottom of the bowl, so the flat beater clears it without scraping.
You can check it with a dime trial, and the dime should move just a little as the beater runs.
In case the dime rattles hard or the beater kisses the bowl, the setting needs a small tweak.
Slight Gap At Bottom
That tiny gap at the bottom can feel confusing at initially, but it’s usually exactly what you want. Your flat beater should nearly touch the bowl without scraping it, so the mixer can work with you, not against you. Try the dime trial demo: put a dime in the bowl, run the beater, and watch the coin. In case it moves a little, your clearance is good. In case it sits still, lower the beater just a touch.
- On bowl-lift mixers, aim for a gap about as thick as a dime.
- With glass bowl tips, check carefully because the fit can vary a bit.
- Make tiny adjustments only, then trial again.
In case the beater hits or chips the bowl, it’s too low; in case food stays behind, it’s too high.
Beater Clears Bowl Cleanly
Once you’ve checked for that tiny gap at the bottom, the next clue is how the beater actually works in the bowl. You want the flat beater to sweep ingredients cleanly without scraping. Good beater height lets you see the mix move from the sides and bottom, while still avoiding bowl contact.
Should you spot dry flour or butter left behind, the beater’s sitting too high and missing the lower edge. In case you hear ticking, see chipped coating, or notice the head shifting, it’s too low and needs adjustment. On tilt-head models, a loose lock can go with wrong clearance, so watch both the latch and the mix. Once the setting is right, your mixer feels steady, your batter comes together, and you can relax like you belong there.
Check With Dime
A quick dime check can save you a lot of guesswork, because it shows whether your flat beater is sitting at the right height. Set a dime in the bowl, run the beater, and watch for a slight move. That little shift means your clearance is on track. Should the dime stays still, your beater sits too low, so do some clearance tuning.
- Unplug a tilt-head mixer before you adjust the neck pin.
- Turn the screw counterclockwise to raise the beater, then clockwise to lower it.
- Re-examine after each tiny change, since factory settings need only a small tweak.
- With glass bowls, trust the coin check less and watch for real rubbing or scraping.
- Once the beater clears well, you’ll see no chipping, and ingredients won’t hide at the bottom.
Why Won’t Your Mixer Lock Properly?
Should your mixer won’t lock properly, start with the neckpin, because that little part often tells you what’s going wrong. In case the silver pin sticks out or moves while you mix, you likely need a neckpin adjustment. A sticky latch can also block the head from seating, so wipe away buildup and add a drop of oil to the spring and pin, then try again.
| Clue | What you see | What to do |
|---|---|---|
| Neckpin | Sticks out | Adjust it |
| Neckpin | Moves while mixing | Check wear |
| Latch | Feels sticky | Clean and oil |
| Beater | Sits too high | Lower it |
| Hinge | Wobbles after years | Get service |
In case the lock still fails, worn hinge parts or concealed gear issues could require a pro.
Is Your Bowl Fully Snapped Into Place?
Should your mixer still feel off after checking the lock, the bowl could be the real problem, because even a small seating issue can throw everything out of line. You’re not alone here, and a careful reset often fixes the mismatch fast.
Watch for these signs:
- The bowl flange doesn’t sit flush.
- The clamp or latch doesn’t fully engage.
- The flat beater touches the bowl during mixing.
On bowl-lift models, reseat the bowl until it clicks. On tilt-head mixers, stop right away should contact start and snap it back in place.
With glass bowls, bowl seating can vary a little, so firm placement matters before you fine-tune beater clearance. Were the beater still to rub, check for debris on the tabs, clamp, or lock.
What Wear Means It’s Time To Grease The Mixer?
Listen for the clues your mixer gives you, because worn grease usually speaks up before the machine quits.
Should you hear loud grinding, squealing, or a sudden rise in gearbox noise after the mixer has sat unused, consider grease degradation. You might also spot dark, crusted grease around the output shaft, or see it tracking down the housing. That means the old food-grade grease is leaking out and the gears need gearbox repacking.
A rough, metal-on-metal feel, or a mixer that no longer turns as smoothly as it used to, also points to worn lubrication. As gear slippage grows or the outer ring gear starts moving, don’t wait. After many years of use, a fresh cleaning and re-greasing can bring your mixer back to the team.
What Should You Inspect Before Every Use?
Before you start mixing, give your stand mixer a quick once-over so small problems don’t turn into messy ones. Check the flat beater and bowl first. You want a slight gap, and the beater should never hit the sides or bottom.
Then make sure the bowl snaps in tight and the tilt-head locks with no wiggle. A loose fit can throw off every batch, and nobody wants that.
- Trial the safety switch and do a quick power reset should the mixer act odd.
- Do a cord inspection for cuts, bends, or loose plugs.
- Notice storage conditions, grease leaks, or grinding sounds before you start.
In case the mixer feels off, stop and adjust it now. That quick habit helps you mix with confidence and keeps your kitchen crew in sync.
When Should You Clean It Yourself Or Call Service?
Should your mixer starts acting up, the next step is deciding whether you can fix it at home or should it be time to call for help. You can often handle simple cleaning and small adjustments yourself, but noises, leaks, or wobbly parts need more care.
In case you hear grinding, whining, or clunking, stop using it and check whether the gearbox needs food-grade grease. If the beater scrapes the bowl or leaves food behind, adjust the beater height and examine the bowl fit.
Whenever the tilt-head won’t lock, tighten the hinge if you can. However, in the event you see metal dust, cracked parts, or ongoing trouble, protect your warranty considerations and get professional diagnostics. That way, you stay safe and keep your mixer in the group for the long haul.
Frequently Asked Questions
How Often Should a Stand Mixer Be Professionally Serviced?
You should have your stand mixer professionally serviced every year, with an annual inspection and a seasonal tune up should you use it heavily. That keeps you in the know and part of the maintenance savvy crowd.
Can I Keep Using a Mixer With a Frayed Power Cord?
No — you shouldn’t keep using it; replace the cord as soon as possible. A frayed cord risks electrical shock and fire. Do not attempt DIY repairs unless you are qualified. Unplug only in emergencies when necessary, and avoid using temporary extension cords.
What Causes a Burning Smell From a Stand Mixer?
A burning smell from your stand mixer often signals an overheated motor or insulation breakdown, like a warning ember in a shared kitchen. You should stop using it, let it cool, and check for damage.
How Do I Remove Hardened Food Debris From the Attachment Hub?
Unplug the unit, brush the hub with a soft cleaning brush, and wipe with a warm, soapy cloth. Dry thoroughly, then apply a small amount of the provided hub lubricant if needed.
Which Parts Should I Inspect for Damage During Routine Maintenance?
Inspect the bowl rim, splash guard, beater shaft, speed control, planetary gear, motor housing, wire assembly, and attachment hub seals. You are not alone; routine checks catch most wear promptly, keeping your mixer reliable and your kitchen crew ready.