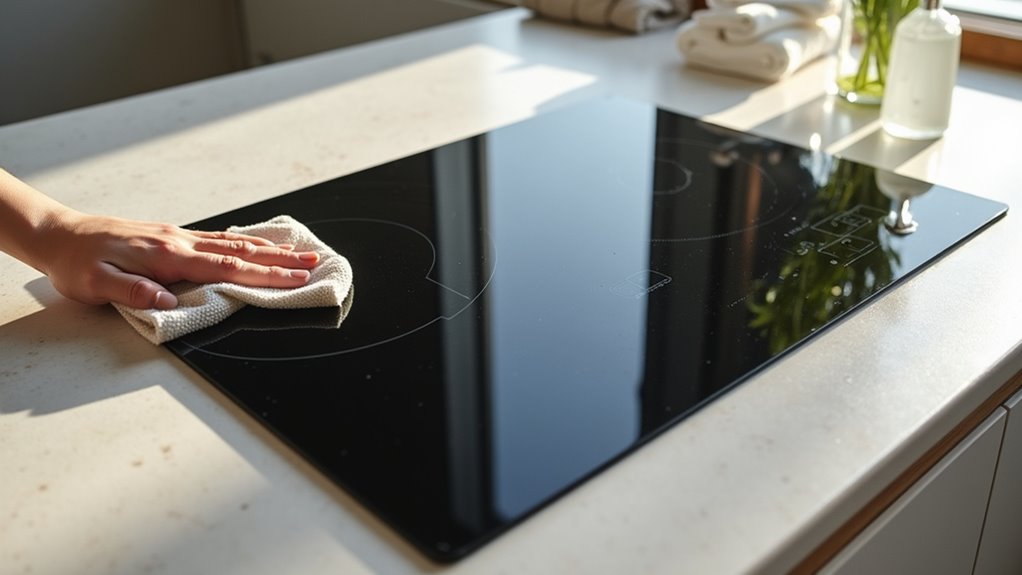
An induction cooktop cleans up quickly with the right approach and a gentle touch. Use safe tools and mild cleaners to remove grime and lift stuck-on food without scratching the glass. Timing matters: fresh spills wipe away easily, stubborn residues respond to brief soaking or steam. Avoid abrasive scrubs and harsh chemicals that can damage the surface or finish. This guide covers practical, accurate steps to keep the cooktop looking sharp and functioning well.
What Is an Induction Cooktop?
An induction cooktop looks sleek, but it works in a very smart way. You cook on a glass-ceramic surface, but concealed coils create a magnetic field that heats only magnetic cookware. That means your pan warms up fast, while the surface stays cooler than gas or radiant electric tops.
This gives you better cooking efficiency and more control, so you can simmer, sear, or boil with less guesswork. It also supports induction safety because the cooktop itself doesn’t glow with heat the same way.
Since the heat starts in the pot, you’ll usually see less burned-on mess. In case you utilize cast iron, enameled iron, or many stainless steel pans, you’re in the right group and ready to cook comfortably.
Tools and Cleaners You’ll Need
Before you start scrubbing, gather the right tools so the job feels calm and manageable.
You’ll want a dedicated cooktop scraper held flat, plus replacement blades for tough, burned-on spots.
Keep a nonabrasive scrubbing pad or the soft side of a sponge nearby so you can lift messes without stressing the glass.
For cleaner, use mild dish soap and water, a baking soda and vinegar paste, or a cooktop cleaner your manufacturer recommends.
A microfiber cloth or dry towel helps you dry and polish the surface, and polishing cloths can add extra shine.
Should your cooktop still feel warm, wear an oven mitt whenever you move nearby cookware.
For deeper care, keep a cleaning kit or reconditioning cream on hand.
Cleaners and Tools to Avoid on Glass Cooktops
Now that you’ve got the right cloths, pads, and cleaners ready, it helps to know what not to bring near your induction cooktop, because the wrong product can turn a small mess into lasting damage.
Skip abrasive materials like steel wool, metal scouring pads, rough powders, and melamine sponges, since they can scratch and etch the glass.
Also avoid chemical hazards such as ammonia, chlorine bleach, rust removers, oven cleaners, and heavy paste scrubs, because they can dull the surface or harm the trim.
Don’t use window cleaners with ammonia or flammable solvents, especially on a warm cooktop.
Finally, stick with approved brands, not random third-party products, so you protect special coatings and keep your warranty safe.
When to Clean an Induction Cooktop
After each cooking session, wipe your induction cooktop once the surface is fully cool, which usually takes just a few minutes, because fresh spills are much easier to remove than baked-on messes.
This daily timing keeps your kitchen feeling cared for, and it helps you stay ahead of messes before they settle in.
For post cooking care, give sugary or melted spills extra attention as soon as the glass cools, since they can harden fast.
A quick damp microfiber wipe and dry usually takes only 2 to 5 minutes, so it fits easily into your routine.
Should you notice stubborn stains, burnt-on residue, or mineral spots, plan deeper cleaning then.
Also, check your owner’s manual for the right schedule and approved products, so you can protect your cooktop and your warranty.
How to Clean an Induction Cooktop
Cleaning your induction cooktop is easier than it looks, and a gentle routine can keep that glass top looking smooth and bright.
Start only after it’s cool, or just warm in case you need to lift light residue. Wipe it daily with a soft microfiber cloth and a few drops of mild dish soap mixed with water.
For stubborn spots, try white vinegar, then add baking soda and let it fizz for 10 to 15 minutes before you use a nonabrasive pad. Should the need arise, hold a glass scraper nearly flat and glide it gently.
Finish by drying and buffing with a clean microfiber cloth. Stick with approved, nonabrasive products, and consult your manual. This simple induction maintenance supports cooktop longevity and helps you feel right at home.
How to Remove Stuck-On Food
Stuck-on food can look scary, but you can usually lift it off without much drama. Initially, let your cooktop cool or stay only warm, then use cooling techniques before you start. Hold a glass cooktop scraper at a flat angle, almost parallel, and gently shave the food away. In case you have a dedicated scraper with a fresh blade, use that for extra control.
After the loose bits are gone, spray white vinegar or a manufacturer-approved cleaner, then add baking soda to stubborn spots. Allow it to fizz for 10 to 15 minutes, and wipe with a nonabrasive pad. For tougher spots, repeat the cycle.
Finish alongside rinsing, drying with a microfiber cloth, and following preventive maintenance tips. Skip steel wool, bleach, ammonia, and your owner’s manual.
How to Remove Burnt-On Marks
Burnt-on marks can feel like the cooktop is fighting back, but you can usually tame them with a little patience.
To begin with, make sure the surface is cool or just warm. Then hold a glass-surface scraper flat and gently lift the residue, so you don’t scratch the ceramic glass. Next, dampen the area with a little white vinegar, add baking soda, and let it fizz for 10 to 15 minutes. That mix helps loosen oil residue and heat discoloration.
After that, wipe it with a nonabrasive pad. Should a spot stay put, use a cooktop scraper at a very shallow angle and keep the blade sharp. Finish with a pea-sized amount of cooktop cleaner or mild dish soap, then buff with a microfiber cloth.
How to Remove Hard Water Stains
For hard water stains, start with white vinegar: wet a soft cloth with it and rest it on the spots for a few minutes so the mineral buildup can loosen.
Then gently rub the area with a microfiber cloth or nonabrasive pad in small circles, and you should see the marks lift without scratching the glass.
After that, rinse the cooktop with plain water and dry it right away, because a quick finish helps keep new white streaks from showing up.
White Vinegar Treatment
Whenever hard water leaves dull white spots on your induction cooktop, white vinegar can help lift them without a lot of fuss. Before you start, keep these vinegar precautions in mind and make sure the surface is cool. You’ll feel better appreciating the fix is simple and safe.
- Put undiluted vinegar on a soft, clean cloth.
- Press it onto the stained spot and let it sit.
- For stubborn marks, wait 10 to 15 minutes.
- Gently rub with a nonabrasive pad, then wipe clean.
If you need scent masking, open a window while you work. Keep liquid away from seams and controls, and never use scratchy tools.
After the stain fades, rinse with clean water, dry with a microfiber cloth, and follow your maker’s polish directions so your cooktop looks cared for.
Recondition And Dry
Once the vinegar has loosened those hard water spots, give the cooktop a careful reconditioning and dry it right away so the glass doesn’t end up with new marks.
Recondition the spot with a small dab of glass cooktop cleaner, or use a few drops of mild dish soap on a soft cloth. Buff in light circles until the finish looks even and streak-free.
In case you still see gritty mineral bits, rinse again with plain water initially, then wipe once more. Skip steel wool, harsh sprays, and scraping, since they can etch the surface and undo your surface sealing.
Finish with a clean microfiber cloth and keep moving until every drop is gone. That quick moisture prevention step helps your cooktop stay smooth, bright, and ready for the next meal.
How to Polish an Induction Cooktop
To bring back that clear, glossy look, start with a cool, fully dry induction cooktop and add just a pea-sized amount of a specialized glass or ceramic cooktop cleaner, or a tiny dab of mild dish soap mixed with water.
With soft surface protection in mind, you’ll use gentle polish techniques that help your cooktop feel cared for, not scrubbed.
Then follow these steps:
- Rub it in small circles with a lint-free microfiber cloth.
- Focus on fingerprinted spots and swirl marks.
- Buff with a clean, dry cloth using steady pressure.
- Repeat on dull spots, or use a nonabrasive pad very gently.
Stay away from abrasive powders, steel wool, and ammonia cleaners.
Also, never polish a hot surface, since that can leave streaks or damage the finish.
How to Clean Around Controls
Make sure the cooktop and control area are completely cool, then lock the controls or shut off power in case your manual says to do that.
Wipe around the buttons with a barely damp microfiber cloth and a tiny drop of mild dish soap, so you can lift light grime without letting moisture sneak into seams.
Should dried spills cling near the edges, use a soft toothbrush or cotton swab with a little vinegar or soapy water, then dry the area right away.
Safe Control Wiping
Gently wipe the area around the controls with a soft, slightly damp microfiber cloth, because even a little care goes a long way here.
You’ll protect touch sensitivity and cut the risk of electrostatic discharge while keeping your cooktop looking calm and cared for.
- Keep the surface cool before you start.
- Use a drop of mild soap on the cloth, not on the panel.
- Skip abrasive pads, bleach, and scrapers.
- Dry the area right away with a lint-free cloth.
Should grime cling near buttons, dab it with a cotton swab or soft toothbrush that’s barely damp.
And should your manual say to avoid wet cleaning, trust that guide and use a dry microfiber cloth instead.
That way, you stay in step with your cooktop and keep the controls working smoothly.
Dried Spill Removal
Wait for the cooktop to cool completely, or at least until it feels warm but not hot, before you tackle dried spills around the controls. To begin, add this step to your safety checklist so you don’t wake up touch sensors or burn your fingers.
Then dampen a soft microfiber cloth with mild dish soap and water, and gently loosen the crusted mess around the controls. Keep moisture light, because you don’t want it sneaking into seams.
For stubborn spots, use a cooktop scraper at a very shallow angle, with the blade flat to the glass, and work outward from the control. Skip abrasive pads, steel wool, ammonia, bleach, and melamine sponges.
Afterward, dry everything well, examine the controls, and in case water slipped inside, switch off the breaker and let it dry fully. A preventive sealant can help nearby edges stay cleaner longer.
How to Treat Scratches and Cracks
Small scratches can be frustrating, but they usually don’t mean your induction cooktop is ruined. You can keep it looking good with a few simple habits, and that helps you feel confident every time you cook. Fine marks stay on the surface, so focus on scratch prevention and gentle care.
- Wipe the cooktop and pan bottoms before use.
- Lift pans instead of dragging them.
- Use cookware with smooth magnetic bases.
- Check your owner’s manual for warranty guidance.
Avoid abrasive cleaners, steel wool, and melamine pads, since they can deepen etching and void coverage. In case your brand allows it, use only approved ceramic-glass polish for minor marks. But should you see a deep scratch, fracture, or crack, switch off the appliance, isolate the fuse, and call service right away.
Best Cleaners for Induction Cooktops
Whenever it comes to cleaning your induction cooktop, the right cleaner can make the job feel a lot less stressful. For everyday messes, you can trust mild dish soap and warm water with a microfiber cloth or soft sponge.
Should you see stubborn spots, try a baking-soda paste for gentle cleaning, then wipe it away. For hard-water marks, white vinegar works well and stays kind to the glass.
Whenever you compare brands, look for cooktop creams like Weiman, Cerama Bryte, Affresh, or Thermador cleaner. They help lift burnt-on residue and leave a polished finish. Choose eco alternatives whenever you desire a simpler routine. Skip ammonia, bleach, steel wool, magic erasers, and abrasive powders, since they can scratch or dull the surface. Employ stronger cleaners only on a cooled cooktop.
Cleaning Stainless Steel Trim
After you’ve handled the glass surface, it’s time to give the stainless steel trim the same careful attention. You’re part of a clean-cooktop crew now, and this step keeps the whole edge looking cared for. Use mild soapy water and a soft cloth, then wipe with the grain for good grain restoration and fewer swirl marks.
- Rinse with clean water.
- Dry right away with a microfiber towel.
- Skip steel wool, bleach, and ammonia.
- Use a manufacturer-approved cream for stubborn grease.
If you try a stainless-steel conditioner, use only a little and keep it off logos, markings, and black finishes so trim alignment stays neat.
With this calm routine, your trim won’t just look tidy; it’ll feel like it belongs right where it is.
Keep Your Cooktop Shiny Between Cleanings
To keep your induction cooktop looking bright between deep cleanings, make it part of your normal routine to wipe it down after every use once the surface has cooled. Use a soft microfiber cloth with a few drops of mild dish soap and warm water, then rinse with a damp cloth.
Right after that, dry and buff with a clean microfiber towel so you don’t leave a white film or watermarks. For small daily messes, a damp cloth alone usually works in 2 to 5 minutes, which fits busy days nicely.
Skip ammonia glass cleaners and abrasive pads, since they can dull the ceramic surface. Also, keep cookware bases clean and dry.
These preventative habits support seasonal maintenance and help your cooktop stay shiny, calm, and ready for the next meal.
Frequently Asked Questions
What Cleaner Not to Use on an Induction Cooktop?
Don’t use abrasive powders or vinegar solutions on your induction cooktop; they can scratch or dull the glass. Protect your surface by choosing gentle manufacturer approved cleaners that keep your kitchen looking cared for.
Can I Clean an Induction Cooktop With Wet Wipes?
Yes, you can use baby wipes on a cool induction cooktop, but they are just a light rain not a storm. Choose nonabrasive wipes, avoid disinfecting sprays with harsh chemicals, and dry it right after.