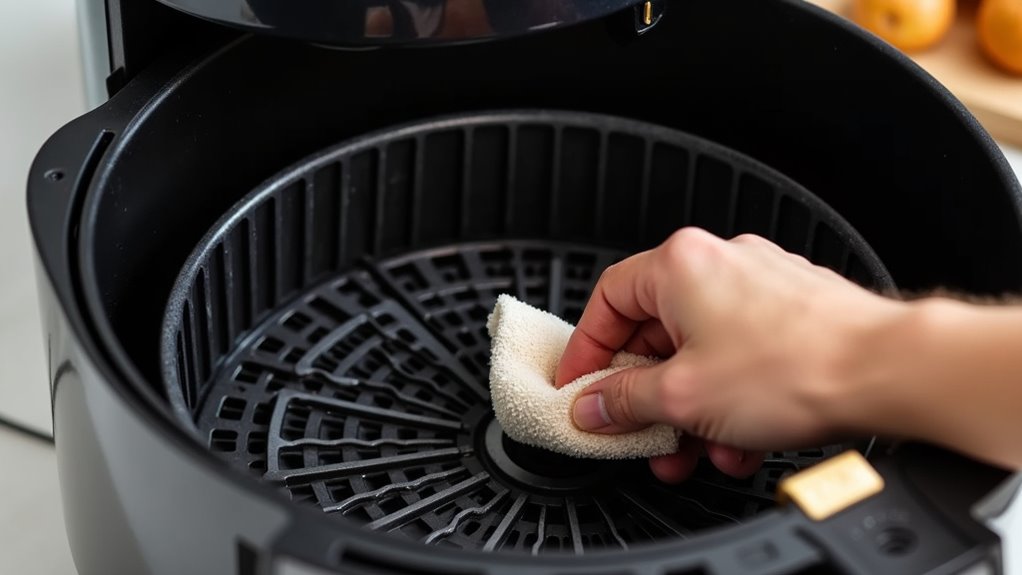
A dirty air fryer heating element causes smoke and off-flavors and can reduce appliance efficiency. Unplug the unit and allow it to cool fully before any cleaning. Remove the basket and tray to access the heating element safely. Use a soft brush or cloth to remove crumbs and loose debris. For grease, gently wipe the element with a barely damp cloth and mild dish soap, rinse cloth, then dry thoroughly before reassembly.
Why Clean the Heating Element
Because the heating element sits at the heart of your air fryer, it needs regular care to keep working safely and well.
Whenever grease and food bits stick to it, they can burn, and that means smoke, odd flavors, and safety hazards you don’t want in your kitchen.
You might also notice performance degradation, since buildup can block airflow and slow heating, which leads to uneven food and longer cook times.
To keep your meals turning out right, check the element every 5 to 10 uses and look for dark residue, dripping grease, or lingering smells.
Should you spot any, a quick clean helps you protect your appliance, keep your space comfortable, and stay confident every time you cook.
What You’ll Need
You’ll need a few simple supplies before you start, and having them ready makes the job feel much easier. Grab a soft brush or old toothbrush, a barely damp microfiber cloth, mild dish soap, and a little baking soda for stubborn grease. Most crucial, unplug your air fryer and let it cool fully so you can clean the heating element safely and without stress.
Cleaning Supplies Needed
Before you start cleaning, gather a few simple tools so the job feels easier and safer. For your air fryer, smart tool selection matters, because the right supplies protect the element and fit your maintenance schedule.
Keep a soft-bristled brush or old toothbrush nearby to lift crumbs from tight spots. Add microfiber or other lint-free cloths so you can wipe without leaving fuzz behind.
You’ll also want mild dish soap, warm water, and a small bowl to dampen the cloth for oily residue. For stubborn grease, use diluted white vinegar or a citrus-based degreaser sparingly.
A flashlight helps you see the coil clearly, and a towel or tray catches debris while you work. Check material compatibility before you start, so nothing gets damaged.
Safe Element Cleaning Steps
Once the fryer has cooled, unplug it and clear out the basket and tray so you can reach the heating element without a struggle. Then follow your safety checklist and do a quick cord inspection before you start.
| Step | What you do |
|---|---|
| 1 | Tilt the unit provided your model allows it. |
| 2 | Use a soft brush to loosen crumbs. |
| 3 | Wipe greasy spots with a damp cloth. |
| 4 | Dry the element with a lint-free cloth. |
| 5 | Let the inside air-dry for 15 to 30 minutes. |
You can gently brush the coils or plate with a dry toothbrush, then wipe nearby metal with a microfiber cloth and mild soap. Keep water out of vents, and never bend wiring. We’ve all had messy fryers, but this calm routine keeps yours safe and ready.
Unplug and Cool the Air Fryer
Start via unplugging the air fryer, then give it time to cool completely so you can work without worry.
Place it on a stable, heat-resistant surface and let the heat fade naturally. Wait at least 30 minutes, and longer provided your manual says so.
Keep an eye on any cooldown indicators, and make sure no lights or fan are running. That simple check helps you stay safe and avoid shocks or burns.
Should your model use cord storage, tuck the cord aside after unplugging so it won’t snag. Resist the urge to tilt or move the unit while it’s still warm, since hot grease can shift.
Once the outside and inside feel room temperature, you’re ready to move on with confidence and care.
Remove the Basket and Tray
Now that your air fryer is cool and safe to handle, pull the cooking drawer out fully and remove the basket with care. Unplug it initially, and give it at least 30 minutes to cool so you stay safe and protect the unit.
For easy basket removal, lift the basket straight up from the tray instead of scraping the nonstick finish.
Next, check both pieces for stuck-on food or pooled grease. In case you see big bits, use a soft spatula or silicone scraper to loosen them gently.
Then place the basket and tray in hot, soapy water for 20 to 30 minutes. A little vinegar or bicarbonate of soda can help with stubborn grease.
After that, wash, rinse, and dry both parts completely before tray storage.
Clean the Heating Element
With the basket and tray out of the way, you can focus on the heating element itself, which often holds the crumbs and grease that can cause smoke or odd smells later.
Initially, unplug the air fryer and let it cool for at least 30 minutes, because safety matters to your space and your peace of mind.
Then, hold the appliance steady and gently brush away loose bits with a soft-bristle brush or dry toothbrush.
For stubborn spots, use a slightly damp cloth with mild soap, but keep it barely wet.
Should residue stay, dab on a little baking soda paste, wait 10 to 15 minutes, and scrub lightly.
This care supports temperature calibration and helps extend element lifespan.
Finish by drying everything fully before reassembling.
Wipe Away Grease and Grime
Start with a quick wipe to lift off the grease and grime before it hardens on the heating element.
Should you notice sticky spots or baked-on residue, give them a little more attention with a soft cloth and gentle cleaner.
This simple step keeps the next deep clean easier and helps you protect the part without any fuss.
Quick Wipe Routine
Before you reach for anything, make sure the air fryer is unplugged and fully cool, since that little pause protects your hands and keeps you safe from electrical trouble. For daily maintenance, this quick wipe routine gives you a simple surface refresh and helps your kitchen stay welcoming. | Step | What you do |
| — | — |
|---|---|
| 1 | Brush off loose crumbs with a soft, dry brush. |
| 2 | Wipe the element with a lightly damp microfiber cloth and mild soap. |
| 3 | Use a touch of vinegar on stubborn grease, then wipe again. |
| 4 | Dry the area completely before you put it back together. |
Keep your hand gentle, and don’t let water gather near vents or wires. A clean, dry element feels like a small win, and it keeps your cooking space ready for the next meal.
Deep Clean Build-Up
At the point grease starts to cling and crumbs seem glued in place, it helps to give the air fryer a deeper, gentler clean.
To begin, unplug it and let it cool for 30 to 60 minutes so you stay safe. Then tilt the unit or open the top as your model allows, and brush the coil with a soft toothbrush to lift loose deep residue without touching wiring.
Next, dampen a microfiber cloth with warm water and mild soap, then wipe the metal with care. For sticky spots, spread a little baking soda paste, wait 10 minutes, and scrub softly.
This kind of coil restoration keeps your fryer ready for the next meal. Afterward, dry every part fully before reassembling.
Use a Soft Brush on Stuck Bits
Gently brushing away stuck bits can make the whole job feel much less frustrating, and it often works better than scrubbing hard.
Initially, make sure your air fryer’s unplugged and fully cool, at least 30 minutes. Then use soft toothbrushing with a dry toothbrush or soft-bristle brush, and follow the bristle direction so you don’t bend the coils. Work in short strokes from the center outward, and keep debris away from the mounting holes.
Should grime still cling, lightly dampen the brush with warm water and a drop of mild dish soap. Right after, switch to a dry brush or cloth. That way, you lift mess without leaving moisture behind.
Finally, wipe the element with a dry, lint-free cloth and let it air-dry fully before you put anything back together.
Clean the Top and Fan Area
Initially, unplug your air fryer and let it cool completely before you tilt it or open the top, so you stay safe from burns and shocks.
Then remove the basket and tray, and use a soft, dry brush to sweep crumbs and char from the heating element and fan blades.
Should grease be still stuck there, wipe it gently with a barely damp cloth, then dry everything well so the fan area stays clean and ready.
Safe Top Access
Once your air fryer is unplugged and fully cool, you can safely open up the top area and check the fan and heating element without risking a shock or a burn.
For safe access, tip the unit forward or follow the manual, and set it on a towel so you protect your counter and keep loose grease from spreading.
- Give yourself room to work.
- Do a quick top inspection.
- Use a soft, dry brush.
- Wipe with a lightly damp microfiber cloth.
If you spot stubborn spots, use a soft toothbrush and dry the area right away.
Then check the vents and fan for trapped crumbs.
You’re not doing this alone; careful cleaning like this keeps your appliance ready and your kitchen team strong.
Gentle Grease Removal
Now that you’ve opened the top area, it’s time to tackle the greasy buildup without making a mess of the parts you want to protect.
To begin, use a soft-bristle brush or dry toothbrush to lift loose crumbs from the coil and nearby housing. Hold the fan steady so the blades don’t spin.
Next, lightly dampen a microfiber cloth or sponge with warm water and a drop of mild dish soap, then wipe the metal surfaces with care. Keep it just barely damp, so nothing drips into vents.
For stubborn spots, use vinegar alternatives or a 1:2 vinegar mix on a cloth, let it sit briefly, then wipe and dry right away. Silicone scrubbers can help with gentle pressure.
Give everything time to air-dry before closing the unit.
Fan Area Care
With the greasy buildup handled, you can move to the fan area and clean the top interior with care.
To begin, unplug the fryer and let it cool for 30 minutes so you stay safe and confident.
Then remove the basket and tray, tilt the unit forward, or check your manual so you can reach the top without forcing anything.
- Place it on a towel for support.
- Brush crumbs from the fan blades gently.
- Wipe stubborn grease with a barely damp cloth.
- Dry every part before you plug it in.
This kind of motor maintenance helps your fryer run smoothly and keeps airflow diagnostics simple later.
You’re not just cleaning; you’re caring for the appliance like a good kitchen teammate.
Avoid Harsh Cleaners and Abrasives
Harsh cleaners can do more harm than good on your air fryer’s heating element, so it’s best to keep things gentle from the start. You want your appliance to stay safe, clean, and ready for the next meal you share.
| Avoid | Use instead |
|---|---|
| Oven cleaner | Mild dish soap |
| Bleach | Diluted vinegar |
| Metal pads | Soft toothbrush |
| Wire brushes | Non-abrasive sponge |
| Direct spray | Slightly damp cloth |
Skip chemical residues, because they can vaporize later and reach your food. Also, avoid abrasive damage from steel wool or scrubbing hard. Instead, dampen a cloth with mild soap, wring it well, and wipe the element carefully. Never pour liquid on it, and don’t use high heat tricks. Then dry everything fully before you plug it back in.
How Often to Clean the Heating Element
A quick wipe every 3 to 5 uses can save you a lot of trouble later, because grease builds up fast on an air fryer heating element and can lead to smoke, off-flavors, and that stubborn burnt smell nobody wants near dinner.
Whenever you build this into scheduled maintenance, your air fryer stays easier to share with pride.
- Wipe it after every 3 to 5 uses.
- Clean sooner in case you see splatters or smoke.
- Deep clean the element and fan every 1 to 2 weeks.
- Increase care in case you use heavy oil, parchment, or fatty foods.
With simple usage tracking, you’ll know whenever your basket got extra messy and whenever to step in.
Should a meal leave a burnt smell, don’t wait. Clean right away, let the unit cool, and unplug it originally.
Dry and Reassemble the Air Fryer
Once the scrubbing is done, drying the heating element and its surrounding space matters just as much as the cleaning itself.
Wipe every surface with a dry, lint-free cloth or paper towel, then let the air fryer sit open for at least 30 minutes. In case you used a damp cloth near electrical parts, give it more time. This pause helps prevent short circuits and rust, and it gives you peace of mind.
Before you reassemble, check the element for loose bits, discoloration, or damage. Should you spot flaking or exposed wiring, stop and contact the manufacturer.
Then reinstall the drip tray, basket, and racks only once they’re fully dry and seated right. Use your safety checklist and storage tips, then run the empty unit at 200°F for 3 to 5 minutes.
Fix Smoke, Smells, and Burnt Bits
Provided that your air fryer is still giving off smoke, odd smells, or those annoying burnt flecks, fortunately you can usually fix it with a careful clean. You’re not alone, and a few small moves can bring back fresh, clean cooking fast.
- Unplug it and wait 30 minutes.
- Tip it as your manual shows, then brush away crumbs and charred bits.
- Wipe the coil with a damp cloth, or use warm soapy water on a wrung-out sponge.
- For grease, try a vinegar mix or bicarbonate paste, then wipe and dry well.
This simple routine supports odor elimination and smoke mitigation. Assuming a smell lingers, run the empty unit at 200°F for 5 minutes.
Once you dry every part fully, you help your kitchen feel safe, calm, and ready for the next meal.
Frequently Asked Questions
Can a Heating Element Be Cleaned?
Yes, you can clean it carefully for safety and to remove mineral buildup. Unplug it, let it cool, then gently wipe away debris using only light moisture and a soft brush.